



A perfume bottle should stay in place when you open the box. Your fingers should have room to reach it, and the bottle should come out smoothly, with the cap still attached. Getting that experience right takes careful coordination between the bottle, insert, and box.
At Jarskingglobal, we plan perfume box inserts around the bottle you’re using, where it will be packed, and how the finished product will reach your customer. A heavy glass bottle, a leather-wrapped design, and a row of slim discovery vials each need a different approach to support and removal.
Here, we’ll walk through material options, bottle fit, sample reviews, and transit protection, then explain how to work backward from your filling facility’s receiving deadline.
1. What Are Perfume Box Inserts and Why Do They Matter?
Perfume box inserts sit inside the outer box to support the product and limit movement. They can be made from foam, paperboard, or molded pulp, with fabric or other finishes added over a supporting structure. When we evaluate inserts for custom perfume boxes, we consider protection, packing efficiency, and how the bottle looks and feels when someone opens the package.
Securing Fragile Glass Perfume Bottles
A bottle that moves inside its box can repeatedly strike the surrounding packaging. Its corners, shoulders, and decorative components may all be exposed. A heavy base also needs adequate support underneath.
We look for suitable contact points on the bottle and identify areas that need clearance. The neck, spray pump, and cap deserve particular attention. An insert that grips the cap while leaving the bottle unsupported can create problems during handling and removal.
We also review bottle protection across the complete package. The retail box, shipping carton, dividers, and packing arrangement all contribute. Thicker foam alone may do little to address a crushed shipping carton or retail boxes shifting inside it.
Elevating the Luxury Unboxing Experience
The insert determines much of what your customer sees first: the bottle’s orientation, how much of it is visible, and the space around it. In luxury fragrance packaging, we review those details alongside the actual experience of picking up the bottle.
A dark insert can frame clear glass beautifully. Bury the bottle too deeply, though, and your customer may struggle to get a grip. We consider finger cutouts, pull ribbons, or openings around accessible parts of the bottle.
Physical samples reveal details a rendering can’t. Run your fingers along the edge. Check whether fibers show up on a black bottle or adhesive odor becomes noticeable when the lid opens. Those small impressions affect the finished presentation.
Ensuring a Snug Fit Between Bottle and Outer Box
There are two fits to check: the bottle inside the insert, and the insert inside the box. A secure bottle can still move in transit if the entire tray slides around.
We work from the box’s finished internal dimensions, allowing for wrapping paper, fabric, adhesive, and ribbons. We then check the insert’s position and overall height with the bottle installed.
Excessive tightness creates its own problems. Scratched coatings, buckled insert edges, or a lid that needs force to close all call for adjustment. Clearances should account for manufacturing tolerances and be confirmed with physical samples.
We also involve the packing team. A prototype carefully assembled by a designer may feel different during repeated packing. Early trials help reveal awkward insertion angles or a tray that lifts out with the bottle.

2. Common Types of Perfume Box Insert Materials
Before comparing materials, we define the job. Are we supporting one heavy bottle or presenting several light vials? Does the design need a smooth display surface, easy assembly, or fewer material types? Those priorities help narrow the options.
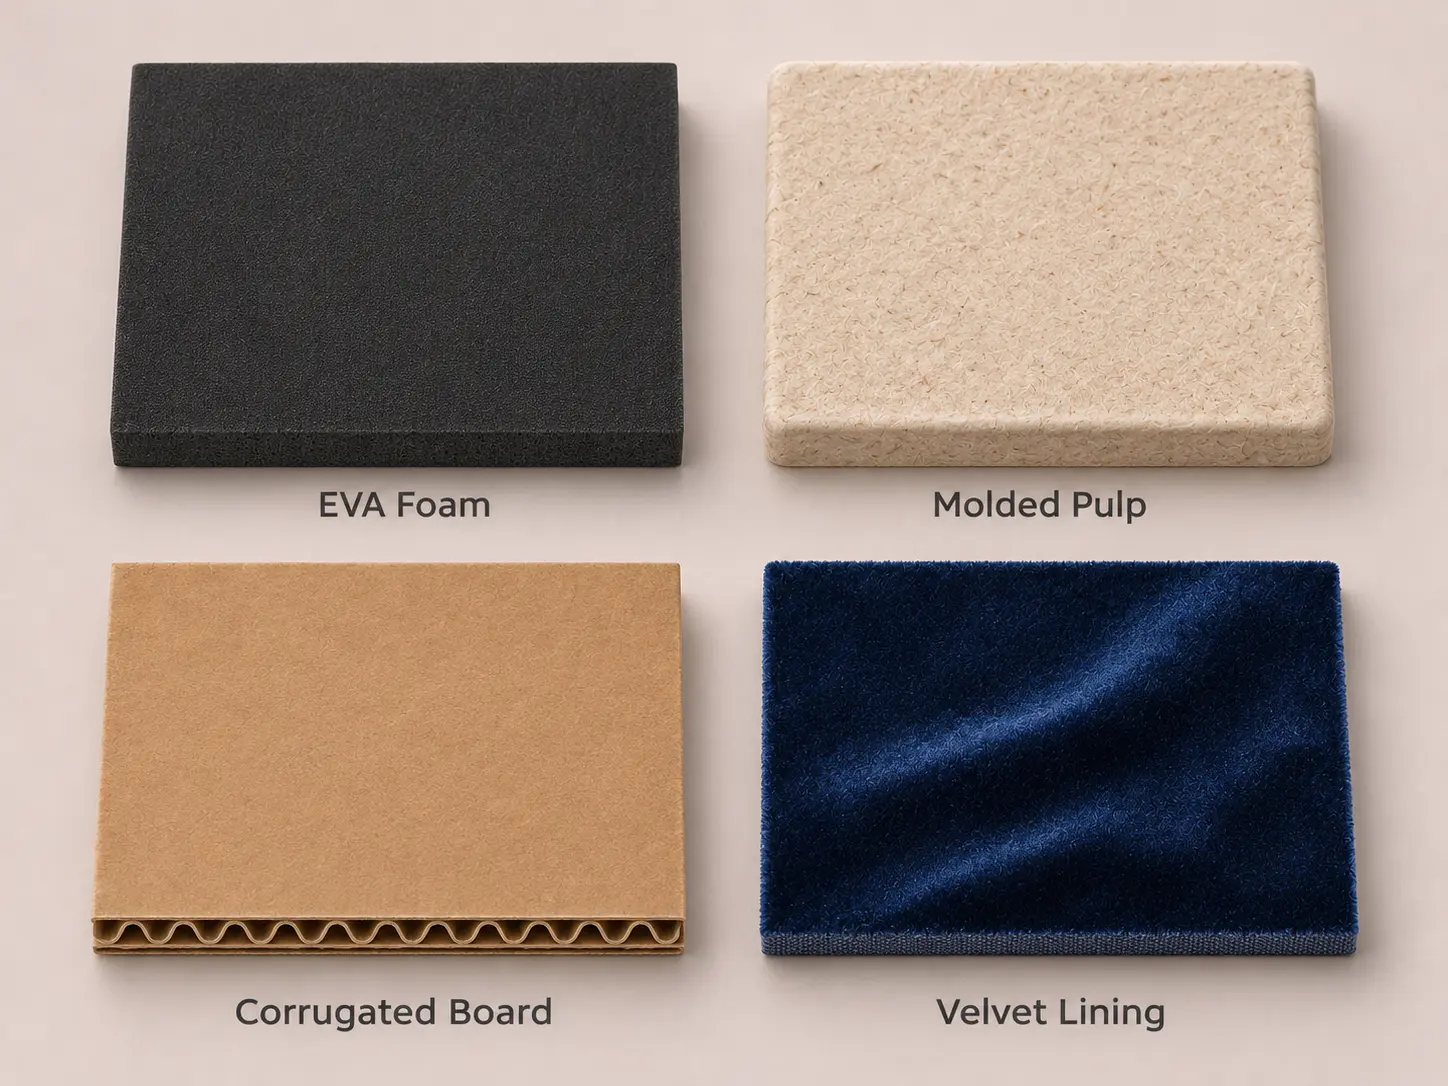
High-Density EVA and Sponge Foam Inserts
Foam inserts can be cut, die-cut, and layered to create shaped cavities. EVA is one option, but “high density” doesn’t tell us enough about protection. We also check the material grade, hardness, compression recovery, supporting thickness, and load-bearing area. Individual grades have different properties, so we consult the supplier’s material specifications.
A thin layer beneath a heavy bottle may leave little room for cushioning, even if it feels firm. A softer material may compress enough to change the bottle’s display height. We provide the structural designer with the assembled weight and contact points, use cushioning data where appropriate, and validate the complete package. Foam type, thickness, and loading all affect performance.
The term sponge inserts also needs clarification. Ask for the actual material, cell structure, and performance requirements so competing quotes cover comparable specifications. During sampling, we check cut edges, shedding, odor, and how the cavity holds up after repeated removal.
Custom Molded Pulp and Paperboard Alternatives
Molded pulp can create recessed cavities, support platforms, and dividers for projects considering fiber-based inserts. Its surface may retain a visible fiber texture or use a smoother molded finish, depending on the material and process.
We check support beneath the bottle, contact around decorated surfaces, and whether the tray holds its shape after removal. Draft angles, corners, and wall thickness need a manufacturing review. Tooling may also need modification if the bottle design changes.
For humid storage or extended shipping, we share the expected conditions with the material supplier and testing team. Dimensions and support should be assessed after appropriate conditioning. We also review coatings, adhesives, and bonded layers before making claims about recycling in the intended market.
Die-Cut Cardstock and Corrugated Dividers
Cardboard inserts can include folded cardstock, laminated paperboard structures, and corrugated supports. For folded designs, we examine thickness, stiffness, grain direction, and folding geometry to see whether the structure can support the bottle after the cavity is cut. Paper weight alone doesn’t define the finished performance.
Corrugated dividers help separate bottles, but we also check support around the bases and shoulders. If bottles can still move vertically, the locating features and overall packing arrangement need further work.
Some paperboard inserts ship flat for assembly at the packing facility, which can reduce incoming storage volume. We review the folding steps and locking tabs with the people doing that work. A material-efficient design that takes too long to assemble can increase labor costs.
Ask the packing team to fold several samples using the proposed assembly sequence. We want to know whether the tabs engage cleanly and whether the bottle stays properly positioned after closure. That feedback can reveal revisions worth making before production.
Where paperboard touches a decorated bottle, any added protective layer should be included in the approved sample and specification.
Velvet, Satin, and Flocked Luxury Finishes
Velvet, satin, and flocking change an insert’s texture and appearance. Satin adds a soft sheen, while velvet can complement matte coatings, leather, or metal details. These finishes generally need a supporting structure underneath, so we review the surface treatment and structural material separately.
Fabric changes cavity dimensions. We check for buildup at corners, visible seams, and folds that reduce finger access. Loose satin may also get pulled into the cavity when someone puts the bottle back.
Final samples should use the intended colors and adhesive system. We look for color transfer, visible fibers, and shedding at flocked edges. If leaked or spilled fragrance could reach these materials, the relevant surfaces also need evaluation with the actual formula.
Use the decorated bottle for that review. A light-colored surface may reveal color transfer, while a dark coating makes loose fibers easier to see. Check the covered edges as well as the broad display surface, especially after repeated handling.
3. Perfume Box Insert Applications by Packaging Style
The same material can behave differently in different boxes. We consider product quantity, opening direction, and assembly method to decide how each bottle is supported, displayed, and removed.
Single-Bottle Retail Perfume Boxes
Single-bottle packaging usually needs to balance shelf presentation, packing speed, and cost. With folding cartons, the insert must work with the box’s base and sidewalls. We check for distortion, stable folded sections, and movement after closure.
Bottle decoration also affects the fit. Raised nameplates, leather wraps, broad collars, and unusual glass shapes can change contact points. Cavities should accommodate the finished bottle to avoid repeated rubbing against prominent surfaces during packing.
If the bottle must face a window or present its logo immediately on opening, the insert should help maintain that orientation. Round bottles need particular attention because they may rotate inside a seemingly well-fitted cavity.
Multi-Bottle Gift Sets and Discovery Kits
For fragrance gift boxes and discovery kits, we review each cavity individually. Bottle diameter, length, cap height, and weight all matter. Products need suitable separation, and removing one should leave the others in place.
Slim vials can be easy to insert but difficult to retrieve. We test finger access, exposed length, and removal direction together. Sets combining full-size bottles, travel sprays, or accessories may need different support depths and structures within the same tray.
Sharing an insert across several SKUs may reduce costs, but every version needs a fit check. Equal fill capacities don’t guarantee matching external dimensions. For frequently changing assortments, cavity identification and clear packing instructions can help the assembly team distinguish products.
Rigid, Magnetic Closure, and Drawer Perfume Boxes
Rigid perfume boxes allow more depth and layered presentation, while their inserts need to accommodate the opening motion. A hinged box should keep the bottle properly oriented, and a drawer should retain its contents as it slides out.
We check whether the insert moves with the drawer, whether a pull ribbon rubs against the bottle, and whether the box edge obstructs finger access. Magnetic closures need a fit review with the product installed, followed by an assessment of any additional transit restraint.
Adding padding inside the lid requires another height check. A lid that looks flat can still put pressure on internal components. We pay particular attention to sustained pressure on the spray actuator or removable cap.

4. How to Size and Design Custom Perfume Box Inserts
Before drawing the insert, we ask for an assembled sample and dimensional information. Confirmed bottles, pumps, caps, and decoration provide a reliable starting point. If a component is still being developed, we identify its unresolved dimensions and their effect on the insert.
Measuring Bottle Dimensions and Neck Profiles
We need the bottle’s maximum length and width or diameter, total height, shoulder profile, base shape, and assembled pump-and-cap dimensions. Nominal capacity describes the fill volume; external measurements define the fit. Front, side, and top views help identify projections and support points on unusual shapes.
Filled weight matters, too. A high center of gravity, heavy cap, or small supporting footprint deserves review in its intended condition. If a substitute is used to simulate weight during development, document it and confirm the design later with representative finished products.
Include dimensional tolerances and representative samples where available. Coatings, wraps, and metal decorations can add thickness, making a cavity that fits bare glass too tight for the finished bottle.
Tell us which measurements are final and which are still under review. If the cap height or decorative wrap changes after the insert drawing is prepared, we can identify the affected areas before the design moves into production.
Preparing Dielines, Cut Lines, and Safety Margins
Paperboard drawings should distinguish cut lines, crease lines, adhesive areas, folding directions, and assembly order. Foam specifications should identify layer thicknesses, cavity depths, base support, and covering requirements. Molded pulp generally also needs three-dimensional information for the forming and tooling review.
We map finger access, bottle contact areas, and clearance zones. The allowance at each location depends on material compression, bottle tolerances, processing, and removal requirements. Applying one clearance everywhere can leave some areas loose while others still bind.
For custom printed packaging, include artwork placement, print safety margins, and its relationship to cutouts. Keep bottle, insert, and box drawings linked through revision numbers so the approved physical sample matches the correct files.
Testing Fit and Reviewing Structural Proofs
We recommend reviewing the structural sample before approving the final materials and finishes. Early checks cover insertion, removal, closure, and tray retention. Later samples should reflect production thicknesses, covering methods, and assembly processes. Renderings help communicate appearance; physical samples establish how it feels.
Pack the sample normally, then remove and replace the bottle repeatedly. Look for torn cavities, scuffed coatings, or an insert that comes out with the product. Specific feedback helps: “The right finger cutout is too shallow, so we have to grab the cap” gives us a clear adjustment to make. Our packaging sample approval guide covers this review process.
Transit testing should use representative bottles, inserts, retail boxes, and shipping cartons, with a procedure suited to the distribution route. Agree on acceptance criteria for breakage, leakage, displacement, scratches, and box damage beforehand. ISTA’s design guidance emphasizes understanding the distribution environment and defining damage criteria before testing.
We also distinguish empty packaging delivered to the filler from filled products shipped onward. Weight and packing arrangements may differ. Record the approved material version, bottle, orientation, and shipping carton for future reference.
5. How to Choose and Order Custom Perfume Box Inserts
We recommend comparing quotes against one agreed specification. That makes it easier to see which protection and assembly requirements each price includes, why costs differ, and what needs reassessment if a material changes.
Comparing Materials by Protection, Aesthetics, and Cost
Use the following comparison to narrow your choices before sampling.
| Material option | Needs to consider | Sample review priorities | Cost items to confirm |
| EVA and other specified foams | Shaped cavities, layered support, consistent presentation | Grade, supporting thickness, removal, surface contact | Material yield, cutting, lamination, covering, assembly |
| Specified sponge material | Soft feel or flexible contact | Compression recovery, support, shedding, odor | Grade, processing, covering, waste |
| Molded pulp | Three-dimensional fiber-based support | Dimensions, load support, cleanliness, environmental conditioning | Tooling, revisions, finish requirements, shipping volume |
| Die-cut cardstock or corrugated | Folded structures, separation, coordinated box support | Board properties, creases, tabs, retention, assembly speed | Tooling, printing, board consumption, folding, labor |
Price velvet, satin, or flocking separately, including the space they occupy. We also compare landed costs, storage volume, assembly labor, and expected losses.
To reduce material, first examine excess box volume and filler, then identify the parts providing protection. Validate the revised design. Our perfume box options can help frame that discussion.
Key Specifications to Send Your Packaging Supplier
A product photo establishes style. An accurate quote also needs dimensional, assembly, quantity, and delivery information.
| Information | Details to provide |
| Bottle and components | Samples, drawings, tolerances, assembled height, filled weight, decoration, clearance areas |
| Box structure | Style, finished internal dimensions, opening direction, bottle orientation, tray attachment, removal requirements |
| Materials and appearance | Material preferences, color, texture, covering, printing, odor and shedding requirements, environmental claim documentation |
| Packing and distribution | Packing location, manual or machine assembly, carton quantities, shipping method, storage conditions, testing requirements |
| Quantities and delivery | Units by SKU, shared or separate cavities, sample reviewers, receiving location, deadline, split deliveries |
If materials are undecided, compare defined alternatives using the same bottle and box dimensions. We can then clarify the processing, sampling, and validation included in each option.
Tell us where packing will happen. Preinstalled trays and flat inserts assembled at the filler create different freight and labor requirements. Flag any possible fragrance contact early, too.
Evaluating Minimum Order Quantities and Sample Kits
Minimum order quantities depend on the material, color, structure, and production method. We distinguish shared material purchases from cavities, printing, or finishes requiring separate runs. Initial quotes should also separate tooling, sampling, and revision costs.
Material kits help compare texture, color, cut edges, and surface quality. Bottle retention requires a custom structural sample tested with its box. Confirm how early samples are made and what the pre-production sample will add, especially for molded pulp or complex coverings.
Once your filler provides a receiving deadline, we work backward through shipping and receiving allowances, inspection and packing, production, approval, and structural sampling. Include time for tooling changes, finish revisions, and sample delivery. If another facility handles final packing, use its receiving requirements.
Confirm assembled height, cavities, box dimensions, and material versions before production. Ask us to identify the latest approval date for each linked component and what happens if it slips. That gives your purchasing team specific decisions to make, such as confirming the cap height before the insert cavity is finalized.
After sign-off, changes to foam grades, board thickness, adhesives, or covering methods should trigger a review of affected requirements and any necessary resampling or testing. During batch inspection, compare cavity dimensions, cleanliness, bonded layers, and trial assembly against the approved requirements. Keep the signed sample and its specification together so everyone has the same reference when a fit or finish question comes up.